“The details are not the details. They make the design.” — Charles Eames
In the world of professional printing, one small oversight can result in a big visual error. That’s why understanding bleed is essential for creating clean, professional results. Whether you’re a seasoned designer or just starting out, getting this one detail wrong can ruin an otherwise perfect project.
Let’s break down what bleed really is, why it matters, and how to properly set it up—whether you’re using InDesign, Illustrator, or Photoshop.
What Is Bleed and Why Is It Important?
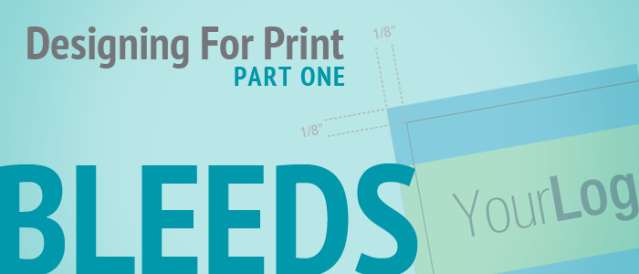
Bleed refers to the area of a design that extends beyond the final trim size. This extra space ensures that when your project is cut down to size, there are no unintentional white edges.
Standard Bleed Size: In the U.S., bleed is typically set to 1/8″ (.125″) on all sides.
Final Size + Bleed: Add 0.25″ to both the width and height of your document to account for the total bleed.
What Happens If You Don’t Include Bleed?
Without bleed, you risk getting a sliver of unprinted white paper at the edge of your design—a sure sign of a poorly prepped file. For business cards, flyers, brochures, or signage, this can compromise the quality and professionalism of your final piece.
How to Set Up Bleed in Different Design Programs
Setting Bleed in Adobe InDesign
InDesign makes bleed setup a breeze.
Steps:
- Open a new document.
- In the setup window, locate the “Bleed and Slug” section.
- Set each side to 0.125″.
- Click OK—and you’re done!
Red guides will now appear around your artboard, helping you keep graphics extended into the bleed area. Bonus tip: Use margins (typically 0.25″) to keep text and critical elements safe from trimming.
Setting Bleed in Adobe Illustrator
Illustrator offers a similar process.
Steps:
- Go to File > New.
- In the “Bleed” fields, enter 0.125″ on each side.
- Click Create.
Your document will now include red guides that indicate the bleed zone. Anything that touches the edge of the artboard should extend to this line.
Setting Bleed in Adobe Photoshop
Photoshop requires a few extra steps, but it’s still manageable.
Steps:
- Add 0.25″ to both width and height when creating your document. (For example, an 8.5″x11″ piece should be set up as 8.75″x11.25″).
- After opening the file, go to Select > All, then Select > Transform Selection.
- Set W and H to your final trim size (e.g., 8.5″x11″) and align the guides accordingly.
From there, drag guides to mark the trim and margin areas. Be sure your background and design elements fully extend to the edge of the bleed.
The Most Important Step: Exporting Your PDF with Bleed
Even with everything set perfectly, if your final export doesn’t include the bleed, your printer can’t use it.
In Adobe apps:
- Go to File > Export > Adobe PDF (Print)
- Under Marks and Bleeds, check “Use Document Bleed Settings”
- Ensure crop marks are included if needed by your printer
Always confirm bleed settings before submitting any print-ready files.
Final Thoughts
Bleed isn’t just a technical checkbox—it’s a vital design principle that separates amateur from pro. By making sure your work includes proper bleed, you’re protecting your vision and ensuring every piece comes out exactly as you imagined.
Need help? At Hightower Graphics, we’ve worked with thousands of clients across Indianapolis and Central Indiana to get their files print-ready and picture-perfect. Whether you’re designing business cards, brochures, signage, or vehicle wraps, we’re here to guide you every step of the way.


